Updated: June 30, 2020
To untrained bystanders, the outside of the home may hold little interest on a day to day basis. It’s easy to glance at your home and assume all is well unless something glaring catches your gaze. However, time passes relentlessly while building materials naturally age and deteriorate in our brutal Houston area climate. HES has created this seasonal exterior inspection checklist to help homeowners manage this important task.
Prone to forget? Never fear, we at Home Exterior Systems are here for you! We’re here to periodically remind you to look a bit closer at the exterior of your home to nip potential problems in the bud. By taking a few minutes to run through this exterior checklist, you can potentially save thousands and have peace-of-mind too. By checking each Spring and again in the Fall, you’ll get the very best out of your home’s exterior.
Following is a DIY “Crib Notes” checklist from a Certified Professional Home Inspector. This document is NOT a substitute for an actual home inspection professional. This checklist merely serves as an easily implemented early alert system for most homeowners.
START AT THE TOP
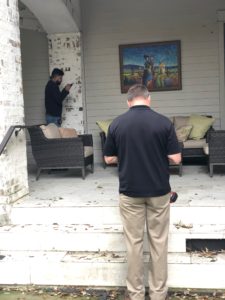
Like professional inspectors, consider beginning your DIY exterior home inspection at the top and work down and around the home. There is no need for you to climb onto your roof, leave that to professionals. Instead, just grab a pair of binoculars or, better still, a digital camera. Taking a few digital photos will allow you to enlarge at the safety of your computer while also providing a reference for comparison in the future.
Chimney
Your chimney should be straight, and depending on which type of fireplace, you do not want to see any missing siding or trim, bricks, or mortar. Note the tightness of the flashing (the sheet metal that keeps the point where the roof and chimney meet from leaking).
** PRO TIP: You can use binoculars to get a better look at areas up high and avoid the need for a ladder.
Roof
Your roof should layer flush to the house. Check for distorted or sunken areas or apparent signs of shingle damage or curling. Dark or discolored splotches may be a sign of mold, mildew, or algae growth. Look for any signs of moisture or rot. Especially around vents, skylights, or other roof penetrations. Soffits and fascia should show no signs of decay, splitting, or cracking. Vents should be tight and firm.
Roof shingles: Are any missing or misaligned by severe winds?
Flashing: Look around the chimney or anything else that sticks out from the roof. Check around dormers, plumbing vent stacks, skylights, antennas or satellite dishes attached to the roof.
Valleys: where roof sections or facets intersect like a “V.” Any leaves or pine needles collecting?
Ridge and Hip: Any missing or out of place parts visible?
** PRO TIP: A handy way to inspect for roof leaks is to access your unfinished attic. If water has gotten under the roof and inside your home, black lines can reveal the path the water takes.
SIDES
Now we switch our focus from the top of the home to the sides of the house. Most inspectors will begin at the front of the home, inspecting top to bottom, left to right and noting any suspected issues and taking reference photos. Advance on around the house and repeat your inspection until you have checked out all sides of the home.
Gutters
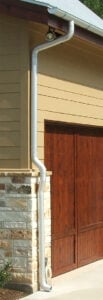
Rain Gutters should be clean, free of rust, and attached securely to the house. Watch out for bending or sagging in the middle. Gutters should drain water into a downspout and away from your home. The very best time to check gutter performance is during a good soaking rain.
Fascia, Eaves, Soffits
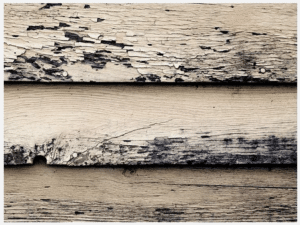
These are the areas around the perimeter of your roof. Frequently, fascia, eaves, soffits consist of painted wood. As the paint ages and caulk breaks down, these areas become vulnerable to deterioration and pests. Fiber Cement trim materials also are susceptible to moisture deterioration when paint and caulk break down. Visually, look for smooth straight, and solid; No bowing, cracking, or apparent signs of peeling or rot.
Wall Surfaces
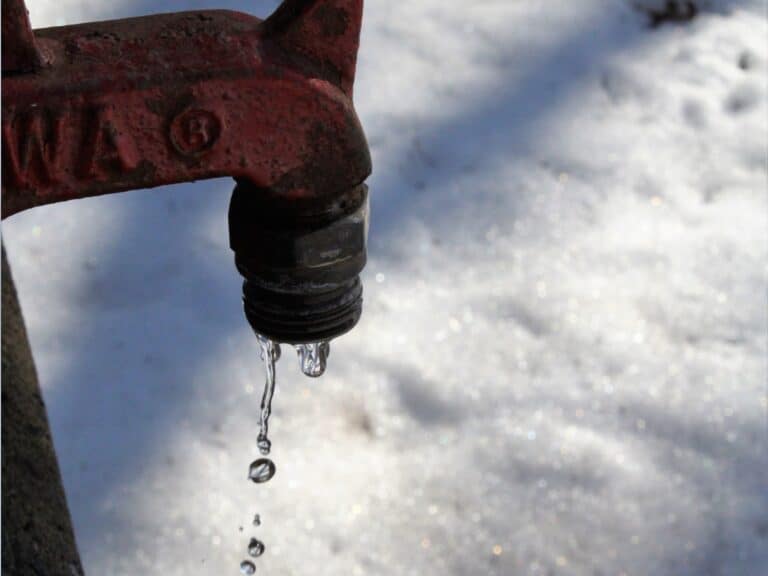
Ideally, there should be at least 6 inches between the ground and any siding or trim on the house. Brick weep holes should be clear and well above ground level. Stains, cracks, paint flaking, or chalkiness should be dealt with as soon as you can. Check carefully for underlying signs of rot underneath painted trim or siding surfaces. Ensure no vines or other plants and vegetation are touching siding or trim. The siding and caulked seams and joints should be tight. Wall penetrations such as hose spigots, dryer vents, A/C lines, lighting, or electrical outlets should show no signs of failing caulk sealant.
** PRO TIP: Lightly press suspect areas of wood or fiber cement with a screwdriver to see if repairs are needed A firm (not spongy) surface means all is well.
Windows and Doors
Window and entry door frames should be intact and reliable, with joints caulked. Make sure there’s no broken glass or screens. Multi-pane windows should show no signs of condensation between panes. Go ahead and operate all windows where applicable. Seals or weather stripping should be intact and pliable. Seals around the doors and windows should be tight and flexible. Check the caulked sealant around all window trim.
Probe the trim and jambs, especially at the lower part of all entry doors, and all exposed windows.
**PRO TIP: Have a helper shine a flashlight around the door seal from the other side of a closed-door, at night, to check for airtightness. You should not see any light around the entry doors from the inside.
Deck
Check all wood carefully, especially handrails, and steps, and vertical posts. Pay close attention to vertical deck posts in the ground that are prone to rot. Also, check where the deck attaches to the home for rot or damage where caulk or flashing may have failed. Don’t be afraid to look underneath and in nooks or crannies for signs of moisture or rot. Even treated high-quality lumber begins to fail eventually. Unnoticed deterioration on an elevated deck could be disastrous if it fails while in use.
General
Standing way back and from a side view, your home should look plumb and square overall and show no leaning or sagging. All framing should be straight. The roof ridge(s) and fascia should sit level. Frame trim around all windows, doors, garage, porch, and patio areas should all look straight firm with no sagging or bowing. Trim are popular areas for flying insects to burrow behind and nest; Especially where caulk sealant is failing.
Property/Grounds
Scan for any standing water, as this is a typical red flag of sinkholes or possible irrigation leakage. There should be no tree branches touching the house or looming above the roof. Sprinklers should be adjusted to avoid spraying the home. Plant beds and mulch should clear well below all siding or masonry weep holes. Garage door framing should be sound, and garage door seals need to work correctly. Make sure all unattached structures, like fences and sheds, are intact and show no signs of mold or insect damage. Children’s play equipment, such as slides, swing sets, should be checked for soundness.
Don’t’ Forget. Inspect!
Please don’t procrastinate! By taking 20 minutes and working through this list, you can potentially save yourselves thousands of dollars and prevent exterior failure. You do not want to discover that a simple re-caulking could have avoided a complete wall system failure. Or missing a small leak that led to mold in the attic or walls. Some warranties will be void, too, if you fail to complete proper maintenance on your home. Paint and caulk are considered maintenance. So it pays to check out your home exterior on a regular schedule.
Let HES Remind You…It’s FREE!
Home Exterior Systems will send you a free seasonal reminder, along with an updated checklist too. It’s free and easy. Be sure to subscribe to our email list at https://www.homeexteriorsystems.com/.
Save Your Dated Photos
While you’re at it, do consider saving your inspection reference photos in a folder. Services like Google Photos or iCloud, to name just two, make it easy to create albums at little or no cost. It will amaze you how much your home changes over time. Plus, you’ll have a terrific reference for insurance purposes, landscape changes, and more.
What If I Find Something Wrong?
If you find something that might be wrong, please don’t delay in calling an expert for an opinion. It may turn out to be nothing, but if you do have an exterior issue, it pays to attend to it ASAP. If in doubt, give an exterior expert, like HES, a call and have them take a look with you just to be sure. Peace-of-mind.
Summary
Now that you’ve taken the time to check your home exterior, you should rest easier. If, during the process of checking your home’s exterior, you came across something you’re unsure about, please call Home Exterior Systems, and let’s discuss it. As always, HES is at the ready to handle anything that turns-up when you need us.